どうもお久しぶり! ホームレスのhumuです。
最近忙しかったのと、Qiita記事に浮気をしていたのであまり投稿出来てなかったですw。
今回は最近流行りの機械学習とディープラーニングをしていこうと思います!
使うデータはkaggleコンペティションにあるIMDBデータ!
www.kaggle.com
こちらのデータは過去10年間にIMDB(internet movie database)で2006年から2016年の人気のあった映画1000本が用意されてます。
今回はそのデータを使って映画のレビューから映画に対して肯定的な意見か否定的な意見かを判定し予測するモデル(AI的な何かw)を作ります。
では、手を動かしながらやっていきます!
まずはデータ分析で使われるpandas 、numpyやデータ可視化のmatplotlib、ディレクトリ操作のosなどのライブラリを入れていきます。
import pandas as pd
import numpy as np
import os
from IPython.display import HTML
import matplotlib.pyplot as plt
%matplotlib inline
分析のためにデータをわかりやすくpandas のDataFrame型に整形する関数を定義します。
今回は、0~10までの評価値がレビューに付与されているので肯定or否定に分けるので
7以上を肯定つまり1,4以下を否定つまり0としてラベル付けします。(中間値となるものは元からデータ側で分けれていますのでご安心ください。)
def mk_dataframe(path):
"""
pathに元ずいてdataframeを作る。
path:str
train or test/pos or neg
files:list
text data to read
"""
data = []
files = [x for x in os.listdir(path)
if x.endswith('.txt') ]
for text_name in files:
# ファイルを読み込む
with open(path+text_name,'r') as text_data:
text = text_data.read()
# IDとreview読み込み
text_num = text_name.rstrip('.txt')
ID,review = text_num.split('_')
# バイナリー値の代入
if int(review) >= 7:
label = "1"
elif int(review) <= 4:
label = "0"
else:
label = ""
data.append([ID,review,label,text])
df = pd.DataFrame(data,
columns=['ID','review','label','text']
,index=None)
return df
kaggleのデータセットから持ってきた訓練用とテスト用のnegative positiveのデータをそれぞれデータフレームとして変更します
# それぞれのデータを読み込む
train_pos_df
= mk_dataframe('../aclImdb/train/pos/')
train_neg_df
= mk_dataframe('../aclImdb/train/neg/')
test_pos_df
= mk_dataframe('../aclImdb/test/pos/')
test_neg_df
= mk_dataframe('../aclImdb/test/neg/')
また、後でデータを分割した時値が固まらないようにデータフレームをシャッフルするような関数を定義します。
同時にネガティブなデータとポジティブなデータを結合します。
def shuffle_data(pos_data,neg_data):
'''
posとnegのdataframeを結合する
'''
full_df = pd.concat([pos_data,neg_data]
).sample(frac=1,random_state=1)
return full_df
# 訓練用とテスト用データの作成
train_df = shuffle_data(train_pos_df
,train_neg_df)
test_df = shuffle_data(test_pos_df,test_neg_df)
train_df.shape,test_df.shape
train_df.head(10)
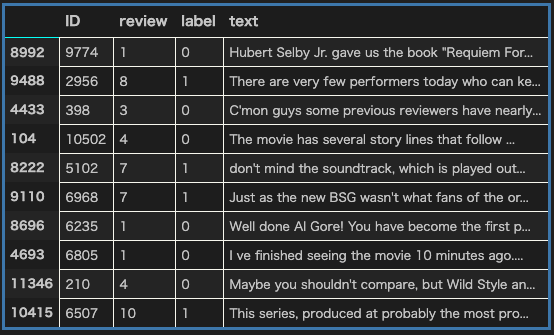
train_df 10行分
一行目のtrain_dfの文章を出力します。
# 文章のサンプル表示
HTML(train_df.text.iloc[0])

一つ目のデータのレビュー
固有の評価数とラベル数を分析します。
# ユニークな評価数 ラベル数
print('review:\n{0}\nlabel:\n{1}'.format(
train_df.review.value_counts()
,train_df.label.value_counts()))
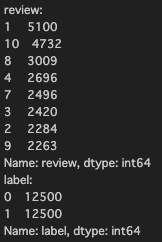
固有の評価数とラベル数
テキストの長さと量の分布を可視化します。
plt.figure(figsize=(15, 10))
plt.hist([len(sample)
for sample in list(train_df.text)]
,50)
plt.xlabel('テキストの長さ')
plt.ylabel('テキストの量')
plt.title('テキストの分布',color='gold')
plt.show()
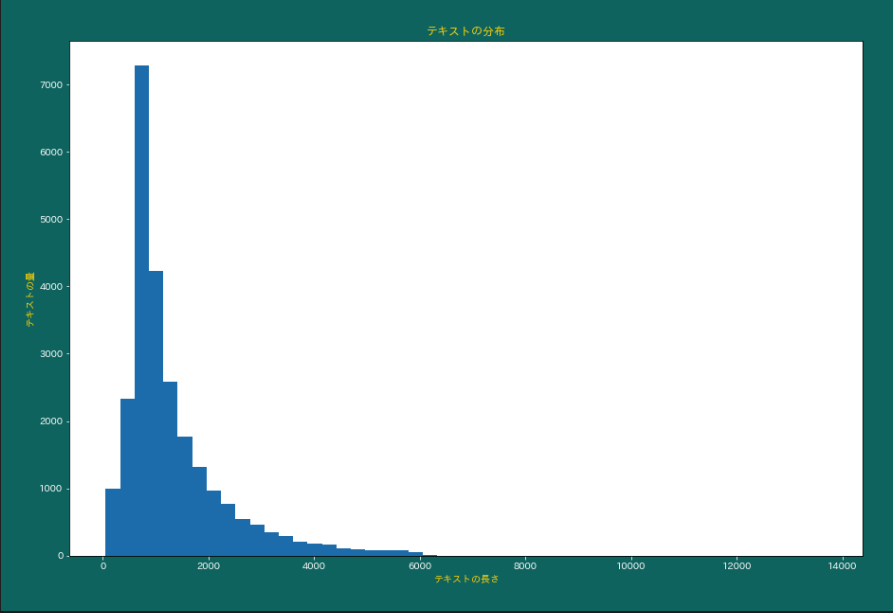
テキストの長さとテキストの量の分布
ここからデータを綺麗にするための必要となるデータクレンジングや前処理をしていきます。
まずは上記にあったデータを予測する(文章から肯定か否定か)ための特徴量(X)と出力結果(肯定か否定か)であるラベル(y)に分割します。
# X,yにデータを分ける
train_data = train_df.iloc[:,2:]
train_X = train_df.iloc[:,3].values
train_y = train_df.iloc[:,2].values
print(train_y.shape)
train_y.shapeの結果は(25000,)で25000個の出力結果があったことが伺えます。
次にone-hotエンコーディングをすることでカテゴリ変数(ここではレビュー内の単語)を機械がデータを理解しやすい形に整形します。
from sklearn.feature_extraction.text
import CountVectorizer
CountVector = CountVectorizer()
docs = train_X
bag = CountVector.fit_transform(docs)
print(CountVector.vocabulary_)
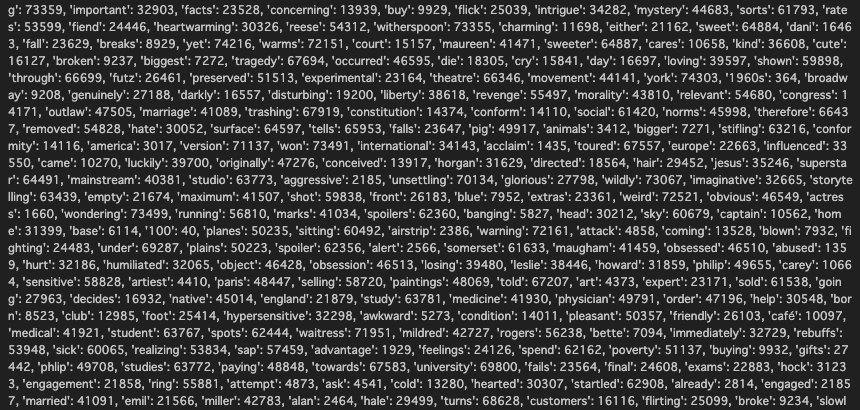
それぞれの単語とそれに対応するカラム名
それぞれの特徴量の形状を出力します。
# # ダミー化させた特徴量の抽出
train_X_features = bag.toarray()
print(train_X_features.shape)
結果:(25000,74849)
それぞれのボキャブラリー(単語)を出力する。
vocab = CountVector.get_feature_names()
print(vocab)
それぞれの単語の数を出力する。
dist = np.sum(train_X_features,axis=0)
print(dist)
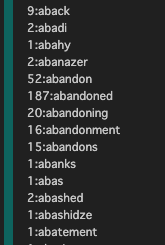
ボキャブラリーとそれぞれの単語の数の対になった出力結果を出します。
print("count:word")
for word,count in zip(vocab,dist):
print("{0}:{1}".format(count,word))
ボキャブラリと個数の対
ここから機械学習していこうと思います。
2値分類のアルゴリズムとしてRandomForestClassifierを使います。
train_test_splitを使って、train用データを75%test用データを25%に分割します。
また評価指標のメトリクスとしてaccuracy_score,roc_auc_scoreを使います。
1.train_test_splitでX_train,X_test,y_train,y_testに分ける
2.clfに分類機を入れる
3.clf.fitでX_trainとy_trainで機械学習モデルを作成する
4.分類機でX_testを入れることでy_testの予測値であるy_predを生成する
5.accuracy_scoreでy_testとy_predの正当率を評価する
6.最後にaccuracyスコアとroc_aucスコアを予想する
from sklearn.ensemble
import RandomForestClassifier
from sklearn.model_selection
import train_test_split
from sklearn.metrics
import accuracy_score,roc_auc_score
X_train,X_test,y_train,y_test
= train_test_split(train_X_features,train_y)
clf = RandomForestClassifier(n_estimators=100)
clf.fit(X_train,y_train)
y_pred = clf.predict(X_test)
accuracy_score =
accuracy_score(y_test.astype('int')
,y_pred.astype('int'))
roc_auc_score(y_test.astype('int')
,y_pred.astype('int'))
print("accuracy_スコア:{0}\nroc_aucスコア:{1}\n"
.format(accuracy_score,roc_auc_score))
予測結果は以下でした。
accuracy_スコア:0.84464
roc_aucスコア:0.8448087599614857
Keras API 深層学習モデル作成(label使う場合)
tensorflowとkerasのバージョンを確認する
# tensorflowとkerasのバージョン確認
from __future__ import absolute_import,
division,
print_function,
import tensorflow as tf
from tensorflow.keras import layers
print(tf.VERSION)
print(tf.keras.__version__)
バージョン↓↓↓
1.tensorflow.kerasで入力層(Input)を用意する
2.layers.Denseで中間層を作る(活性化関数はreluを使用する)
3.出力層には活性化関数にsoftmaxを使用する
from tensorflow.keras import Input
# 入力層の作成
inputs = tf.keras.Input(shape=(74849,))
# 中間層
x = layers.Dense(64,activation='relu')(inputs)
x = layers.Dense(64,activation='relu')(inputs)
# 出力
predictions =
layers.Dense(10,activation='softmax')(x)
ではディープラーニング用のモデルを作る
1.inputとoutputの変数をモデルに指定する
2.深層学習の方法をmodel.compileで指定する(optimizerに最適化するための関数を入れる:lossに損失関数を入れる:メトリクスに評価指数を入れる)
3.深層学習のモデルに学習させる(batch_sizeはデータを一括処理する単位を入れる。:epochsに損失関数を最小にするための学習回数を入れる)
# モデル作成
model = tf.keras.Model(inputs=inputs,
outputs=predictions)
model.compile(
optimizer=tf.train.RMSPropOptimizer(0.001),
loss='sparse_categorical_crossentropy',
metrics=['accuracy'])
# 5エポック分学習
model.fit(X_train,y_train,
batch_size=32,
epochs=5)
# train_y.shape,train_X_features.shape
Epoch 1/5
18750/18750 [==============================] - 29s 2ms/sample - loss: 0.0640 - acc: 0.9795
Epoch 2/5
18750/18750 [==============================] - 29s 2ms/sample - loss: 0.0513 - acc: 0.9837
Epoch 3/5
18750/18750 [==============================] - 27s 1ms/sample - loss: 0.0360 - acc: 0.9887
Epoch 4/5
18750/18750 [==============================] - 25s 1ms/sample - loss: 0.0263 - acc: 0.9922
Epoch 5/5
18750/18750 [==============================] - 22s 1ms/sample - loss: 0.0183 - acc: 0.9948
X_trainで学習したモデルでX_trainとy_trainを評価してみます。
そして結果は損失関数(loss)と評価結果(acc)を出力する。
今回の結果はおよそ0.99なので過学習だと思われますが今回はとりあえず、ディープラーニングをしていこうという程なので今は置いておきます。
train_score = model.evaluate(X_train,y_train)
print(train_score)
print(model.metrics_names)
18750/18750 [==============================]
- 18s 957us/sample - loss: 0.0116 - acc: 0.9967
[0.011612714384999126, 0.99674666]
['loss', 'acc']
また、損失関数でsparse_categorical_crossentropyを使ってるので、結果が指数など0,1で出ないので、numpyのround関数を使って0.5以上を1とし、0.5以下を0とする。
y_pred =
np.round(model.predict(X_test,batch_size=5))
y_pred[:10]
y_test[:10]
array(['0', '1', '1', '1', '1',
'1', '1', '1', '0', '1'], dtype=object)
ここでテストデータを使ってモデル評価をします。
test_score = model.evaluate(X_test,y_test)
print(test_score)
6250/6250 [==============================]
- 6s 891us/sample - loss: 0.1961 - acc: 0.9546
[0.19614510532215237, 0.95456]
出力結果は約0.95でした。
ほとんど予測できてますね。
こんな感じでホームレスが機械学習とディープラーニングをしていきました!


